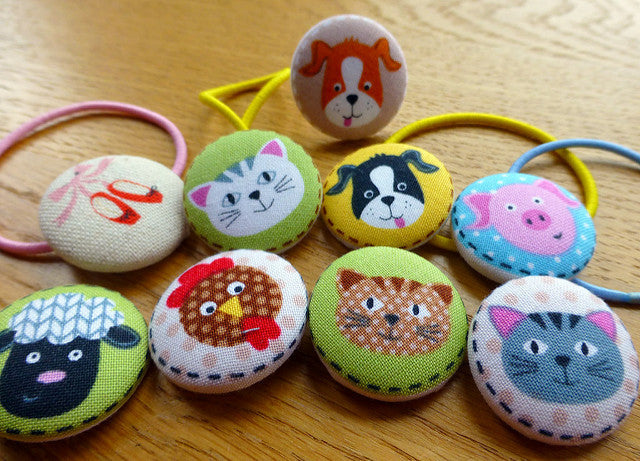
We have some self cover button fun on our blog today! Judith from the Just Jude Blog brings you these Self Cover Buttons which are so easy & versatile to use.
And if you love fussy cuts, you're going to love making these!

How about cute hair bobbles for the kids ....
28mm using wire button backs. Thread hair bobble through wire back.... or cuff links earrings for the grown ups!
15mm and 19mm using flat metal backs. Glue earring or cuff link backs onto flat metal back.
Some rings perhaps ....
28mm using flat metal backs. Glue ring back onto flat metal back.
...even magnets to keep essential lists in place.
28mm using flat metal backs. Glue magnet onto flat metal back.
Or simply create your own supply of buttons in your favourite fabrics!
28mm using wire button backs
Whatever way you wish to use your self covered buttons, here is the super easy tutorial on how to make them.
(There are 7 sizes available,)
You will need:
Self covered button parts (front & back) & pressing tool
Fabric scraps
hair bobble/magnet/ring back/cuff links/earring backs
Glue
1. Cut a circle of fabric at least 1cm wider than the button front you want to cover (sizing chart provided).
2. Place the fabric over the clear tool, wrong side facing up. Push the button front into the fabric and the tool.
4. The tool is clear so you can flip it over and check the position of any fussy cuts.
5. Fold the excess fabric into the centre of the button and insert the button back. You can either push this down with your fingers or use the pink tool provided.
Flat metal back shown
6. Push out the finished button.
And next month I'll bring you a tutorial on how to show off your stylish covered buttons.
Have a tonne of button fun!
Jude xo
(All fabrics used are available at Fabric Yard.)

